The ngSwitch is an Angular structural directive,
which allows us to add or remove DOM elements. It works in conjunction with ngSwitchcase, &
ngSwitchDefault directives. It is similar to the switch statement of JavaScript. In this tutorial,
we will look at the syntax of ngSwitch, ngSwitchcase &
ngSwitchDefault. We will show you how to use these directives using an
example. The examples include ngSwitch Example, multiple ngSwitchCase, Loose Equality
Checks, etc.
You can download the source code from GitHub
The ngSwitch is an Angular directive, which allows us to display one or more DOM elements based on some pre-defined condition.
The following is the syntax of ngSwitch. It contains three separate directives.ngSwitch, ngSwitchCase & ngSwitchDefault.
<container_element [ngSwitch]="switch_expression">
    <inner_element *ngSwitchCase="match_expresson_1">...</inner_element>
    <inner_element *ngSwitchCase="match_expresson_2">...</inner_element>
    <inner_element *ngSwitchCase="match_expresson_3">...</inner_element>
    <inner_element *ngSwitchDefault>...</element>
</container_element>
ngSwitch is bound to container_element like div etc. We assign a switch-expression to the ngSwitch via property binding syntax. Angular evaluates the switch_expression at runtime and based on its value displays or removes the elements from the DOM.
ngSwitchCase is bound to an inner_element, which we must place inside the container_element. We use * (Asterix symbol), because it is a structural directive. We also assign a match_expression, which Angular evaluates at runtime. The Angular displays the inner_element only when the value of the match_expression matches the value of the switch_expression else it is removed from the DOM.
If there is more than one match, then it displays all of them.
Note that the ngSwitchCase does not hide the element, but removes them from the
DOM.
ngSwitchDefault is also bound to an inner_element, which we must place inside the container_element. But it does not have any match_expression. If none of the ngSwitchCase match_expression matches the switch_expression, then the angular displays the element attached to the ngSwitchDefault
You can place ngSwitchDefault anywhere inside the container element and not necessarily at the bottom.
You are free to add more than one ngSwitchDefault directive. Angular displays all of them.
Create a new Angular project. Add the bootstrap CSS to the project by adding the following in the index.html
<link rel="stylesheet" href="https://maxcdn.bootstrapcdn.com/bootstrap/4.0.0/css/bootstrap.min.css" integrity="sha384-Gn5384xqQ1aoWXA+058RXPxPg6fy4IWvTNh0E263XmFcJlSAwiGgFAW/dAiS6JXm" crossorigin="anonymous">
Create a variable num in your Angular Component class
num: number= 0;
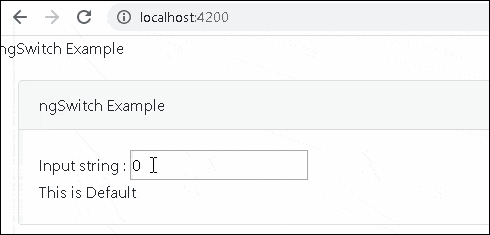
<div class='card'>
  <div class='card-header'>
    ngSwitch Example
  </div>
  <div class="card-body">
    Input string : <input type='text' [(ngModel)]="num" />

    <div [ngSwitch]="num">
      <div *ngSwitchCase="'1'">One</div>
      <div *ngSwitchCase="'2'">Two</div>
      <div *ngSwitchCase="'3'">Three</div>
      <div *ngSwitchCase="'4'">Four</div>
      <div *ngSwitchCase="'5'">Five</div>
      <div *ngSwitchDefault>This is Default</div>
    </div>
  </div>
</div>
Now let us examine the code in detail
Input string : <input type='text' [(ngModel)] ="num"/>
We bind the num variable to the input box.
<div [ngSwitch]="num">
We attach the ngSwitch directive to the div element, then bind it to the expression num.
<div *ngSwitchCase="'1'">One</div>
Next, we have a few ngSwitchCase directives attached to the div element with matching expressions “1”,”2” etc. Whenever the num matches these expressions, the ngSwitchCase displays the element attached to it else it removes it from DOM.
<div *ngSwitchDefault>This is Default</div>
The ngSwithcDefault does not take any expression, but it is displays only when all other ngSwitchCase match expressions fail.
The following uses the array of objects instead of a variable.
class item {
    name: string;
    val: number;
}

export class AppComponent
{
    items: item[] = [{name: 'One', val: 1}, {name: 'Two', val: 2}, {name: 'Three', val: 3}, {name: 'Four', val: 3}, {name: 'Five', val: 3}];
    selectedValue1: string= 'One';
    selectedValue2: string= 'One';
    selectedValue3: string= 'One';
    selectedValue4: string= 'One';
}
Note that we have two matches for *ngSwitchCase="'Two'".ngSwitchcase renders both.
<div class='card'>
  <div class='card-header'>
    Multiple ngSwitchCase with same condition
  </div>

  <div class="card-body">
    <select [(ngModel)]="selectedValue1">
      <option *ngFor="let item of items;" [value]="item.name">{{item.name}}</option>
    </select>

    <div [ngSwitch]="selectedValue1">
      <p *ngSwitchCase="'One'">One is Selected</p>
      <p *ngSwitchCase="'Two'">Two is Selected</p>
      <p *ngSwitchCase="'Two'">Two Again used in another element</p>
      <p *ngSwitchDefault>This is Default</p>
    </div>
  </div>

</div>
You can also make use of ng-template directly instead of *ngSwitchCase. In fact *ngSwitchCase="'One'" is a shortcut to ng-template [ngSwitchCase]="'One'".
<div class='card'>
  <div class='card-header'>
    ngSwitch using ng-template
  </div>

  <div class="card-body">

    <select [(ngModel)]="selectedValue2">
      <option *ngFor="let item of items;" [value]="item.name">{{item.name}}</option>
    </select>

    <div [ngSwitch]="selectedValue2">
      <ng-template [ngSwitchCase]="'One'">One is Selected</ng-template>
      <ng-template [ngSwitchCase]="'Two'">Two is Selected</ng-template>
      <ng-template ngSwitchDefault>This is Default</ng-template>
    </div>

  </div>
</div>
More than one ngSwitchDefault. Works perfectly ok.
<div class='card'>
  <div class='card-header'>
    Multiple ngSwitchDefault Directives
  </div>

  <div class="card-body">
    <select [(ngModel)]="selectedValue3">
      <option *ngFor="let item of items;" [value]="item.name">{{item.name}}</option>
    </select>


    <div [ngSwitch]="selectedValue3">
      <div *ngSwitchCase="'One'">One is Selected</div>
      <div *ngSwitchDefault>This is Default 1</div>
      <div *ngSwitchCase="'Two'">Two is Selected</div>
      <div *ngSwitchDefault>This is Default 2</div>
    </div>


  </div>
</div>
Angular uses loose equality checks to compare the ngSwitchCase expression with the ngSwitch expression. This means that the empty string "" matches 0.
<div class='card'>
  <div class='card-header'>
    loose equality Empty string, "" matches 0
  </div>

  <div class="card-body">

    Input string : <input type='text' [(ngModel)]="num" />

    <div [ngSwitch]="num">
      <div *ngSwitchCase="0">Zero is Selected</div>
      <div *ngSwitchCase="1">One is Selected</div>
      <div *ngSwitchCase="2">Two is Selected</div>
      <div *ngSwitchDefault>This is Default 2</div>
    </div>


  </div>
</div>
You may also want to share the template between two values. For Example One Template for the values One & Two & another template for values Three & Four. One option is to repeat the template under each switch case. Or you can also make use of the ngTemplateOutlet to share the template as shown below.
<div class='card'>
  <div class='card-header'>
    Sharing Templates
  </div>

  <div class="card-body">

    <select [(ngModel)]="selectedValue4">
      <option *ngFor="let item of items;" [value]="item.name">{{item.name}}</option>
    </select>


    <ng-container [ngSwitch]="selectedValue4">

      <ng-container *ngSwitchCase="'One'">
        <ng-container *ngTemplateOutlet="sharedTemplate12"></ng-container>
      </ng-container>
      <ng-container *ngSwitchCase="'Two'">
        <ng-container *ngTemplateOutlet="sharedTemplate12"></ng-container>
      </ng-container>

      <ng-container *ngSwitchCase="'Three'">
        <ng-container *ngTemplateOutlet="sharedTemplate34"></ng-container>
      </ng-container>

      <ng-container *ngSwitchCase="'Four'">
        <ng-container *ngTemplateOutlet="sharedTemplate34"></ng-container>
      </ng-container>

      <ng-template #sharedTemplate12>Shared between 1,2</ng-template>
      <ng-template #sharedTemplate34>Shared between 3,4</ng-template>
      <ng-container *ngSwitchDefault>Default Template</ng-container>

    </ng-container>

  </div>
</div>
You can download the source code from GitHub